Ok, I must admit it that I am a not only an aspiring writer, but I've always been facinated with Special Effects Make-Up. Call it a curse of getting a copy of ILM's Movie Magic Illustrated book when I was about seven years old. I had no idea that people could make whole careers out of doing movie make up. Maybe it's good I didn't know or I might not have gone into engineering. It probably helps with my engineering training to understand not only the art, but the science behind making some of the materials work. I find that I am able to work with both the materials as well as the artistic aspects of making molds, clay forms, and lifecasting my own bady parts. These are all elements needed for making some amazing special effects make-up for Halloween and just generally to scare the be-jeiuss out of my friends and collegues. Perhaps later, I will make it my second career, but I find for now I need my "day job" to pay for my materials to get involved with all my little hobbies....
Here's a few examples of what I have done:
My very first set of "werewolf" or "gargoyle" fanges.
(yes they DO fit in my mouth perfectly and I can talk with them in).
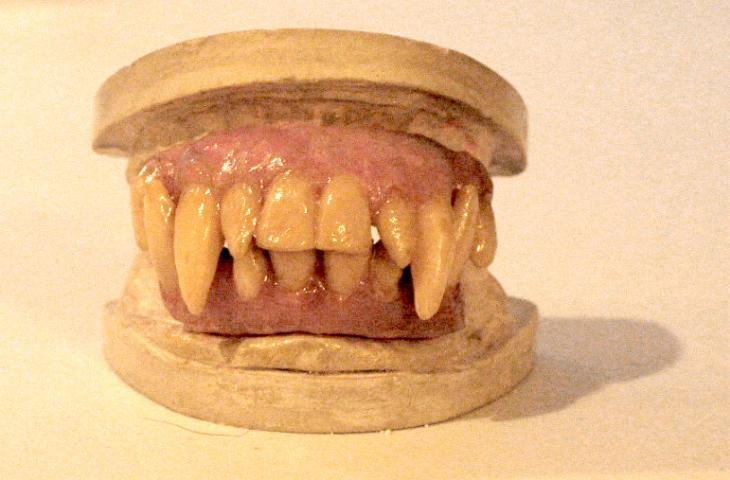
I did my own Algenate impressions of my own teeth. Then sculpted the teeth themselves out of white, two part acrylic. I then did a mock up of the gums with clay and made a small silicone mold to hold the teeth in exactly the right positions so I could fully close my mouth and have my real back teeth touch each other.
This is the clay form is below. It looks a little like the fully finished pink acrylic above, but it's not. Note how "white" the teeth are here. This is the raw form before the mold was made over it. The pink "gunk" that is sitting in the cracks of my own teeth impression is a release agent.
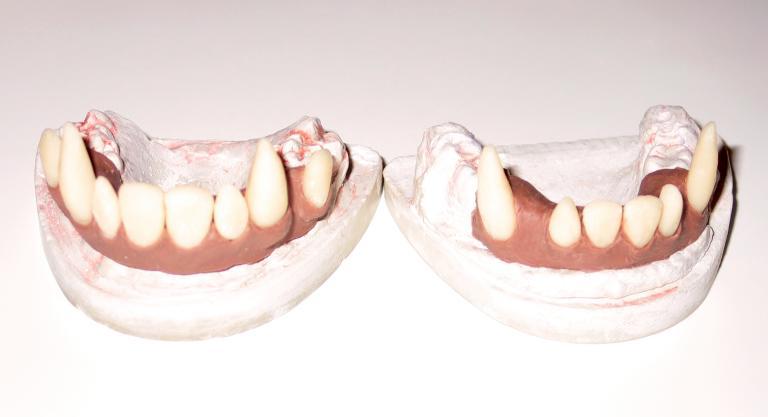
Once this mold was set, I then made up the pink two part acrylic and poured it over the teeth that were then stuck into the mold. I used the clean impression (not with the clay in it holding the space for the pink acrylic) to press back into the silicone mold so that my teeth would fit sungly into the new "pink gums". I repeated this part for both the top and bottom teeth porttions. A few hours later...pop out the impression and clean up the mold edges with a small dremel tool to smooth it all out. Then add a little enamel paint in blue, purple and red with a very fine brush to mimic veins and capilaries...and a little grunge yellow, brown, grey and green on the teeth to make it look like the monster hasn't brushed in a while and ....there you go. Werewolf Central!
Additional photos of the finished teeth from another angle.
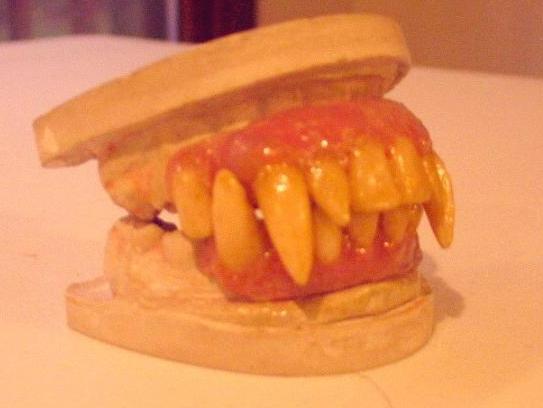

Not too bad for my very first time at trying to make a dental appliance it if I do say so myself.
I had so much fun doing it and since I already had the base impression of my own teeth, I made a set of Klingon upper teeth for a Halloween/Convention costume. They came out even better, thinner in the gum area and fit over my top teeth almost seamlessly.
I'll have to get a photo of them to post in a spot below a little later.
Of course, you can't just stop at scary teeth. Which is why I decided of all the classic things to make, a Klingon head ridge would probably the next easiest thing to try to make. So algenate, a bald-cap, and a large bowl later there I was leaning over the sink, trying not to drown myself by sucking wet alginate up my nose. A little while later, I had my head impression from upper lip to top of my head. Then I had to fill the alginate impression with some Ultracal white to make a "mannequin" plate of my face to do the clay work sculpting of the "headpiece". As with almost all Hollywood type "appilances" (that's the techincal name for the mask pieces) that fit directly on an actor or actresses' face, the clay sculpting has to fit the face exactly so that expressions and movements of the actor or actresses eyebrows, smiling, or other "expressions" don't make the make-up pop off. In Hollywood, time is money, so the more time that is spent touching up make-up the less time actors are reading their lines and getting it all on film.
So making a life cast to get an exact match for the person wearing it, especially with any close-ups...pretty important. If you plan to wear this make-up in a near professional look for a long time at a convention or for Halloween party or any place people will be right up next to you, it needs to look real and feel real.
So my goal became, oh what the heck, let's go to the big Star Trek Convention in Vegas in 2011 and try to win that $2000 prize for the best Klingon Outfit. I did my best, to do Grilka...from Deep Space 9.
So about six days later...clay work, negative mold forming and a little help from they guys down at Monster Makers Inc. I had my gelatin Klingon head piece. All it needed was some hair and make up added. Six hours later, sitting in a hotel in Vegas, I finished the hair (glue on). I wanted to do the proper punch hair, but that takes FOREVER to do and I didn't have the time to complete it. So, second best option, I layered it with the application glue. It worked ok, but wasn't the highest quality, almost real, effect I really wanted, but it was close for the first time.
So here it is.
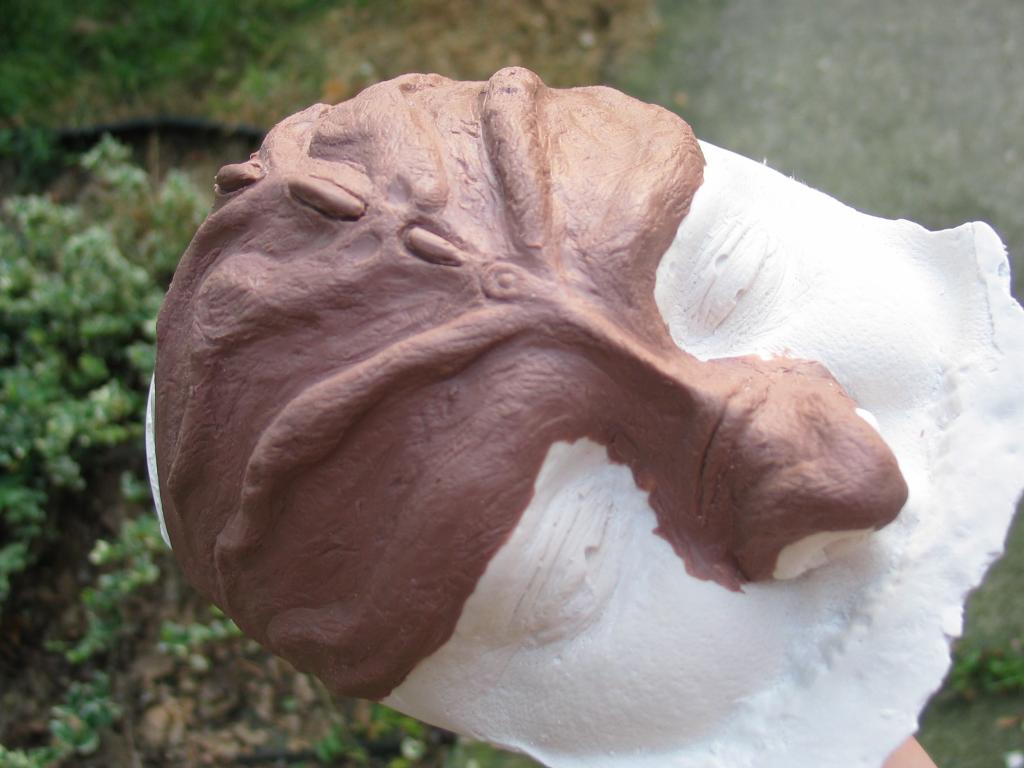
The initial clay sculpt over my own lifecast face.
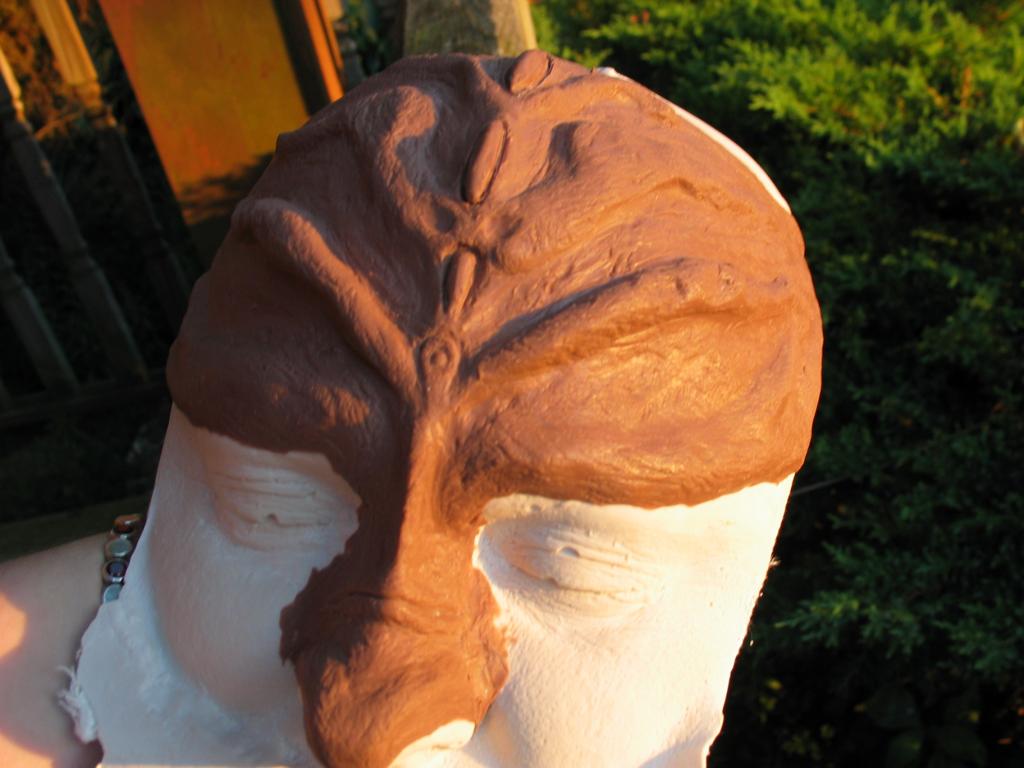
Another photo so you can see the clay detail to make it look like skin. This is very important to give it a life like quality in the mold so that the final foam latex, platinum silicon (dragon skin is ideal), or gelatin which is what I finally used, will pick up this same effect when it's molded.
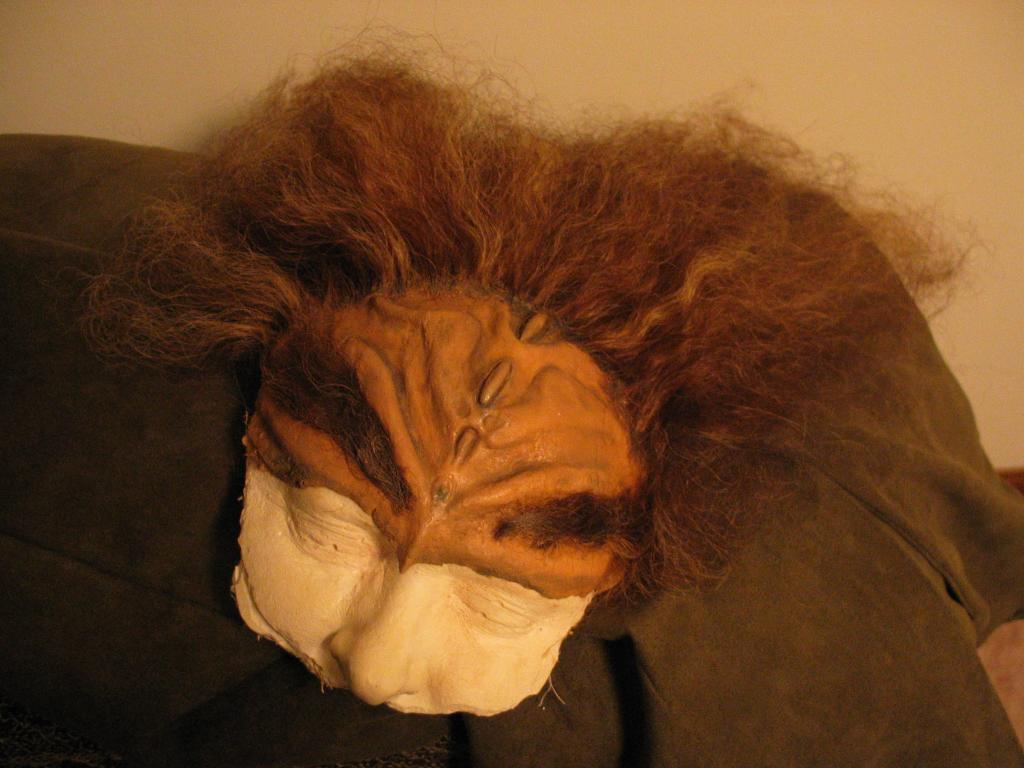
The final product. (Yes, I did finally remove the nose, it was a problem and should have been a second piece, live and learn.) For a comparison, here is a link to a you tube clip of "Grilka" from DS9, played by Mary Kay Adams. https://www.youtube.com/watch?v=mmZx4yqguYk
Or you can try going to "Memory Alpha" and taking a look at this photo.
http://en.memory-alpha.org/wiki/Grilka
You can see just how close I really got to that make up head piece. Not too bad for just doing the sculpting work off of a few photos and the video I have for DS9. Again, this was my first really serious attempt at using the various materials, sculpting the clay, making my own lifecast (not easy to do when you can't see to do it) and working with materials like foam latex, silicone and gelatin.
Needless to say, I don't do very many Star Trek Conventions. This was actually only the second one I had ever gone too. I am not big on convention stuff in general, but doing the Vegas one before Nimoy retired was one of those "bucket list" things I can check off now. Of course there are people who have been going to conventions, working on making or adding to their Klingon Costumes for years and years ahead of me, so I didn't win the big prize...but I did get to be up on stage with "Martok" (J.G. Hertzler) ,"Gowron" (Robert O'Reilly), "Lursa" (Barbara March), and "B'Etor" (Gwynyth Walsh) all in full make up along with about 15 other convention attendees in full Klingon costume for about 20 minutes while they did their little stage bit for the 2011 Star Trek Convention. Did I have fun...Ohhhh Yeah... you betcha!
Will I do more special effects make up? Oh yeah. This is just the beginning of my special effects hobby and I am getting better at it as I do it. Who knows...maybe someone will want to hire me for a little theater or movie work....maybe.
Something familiar?
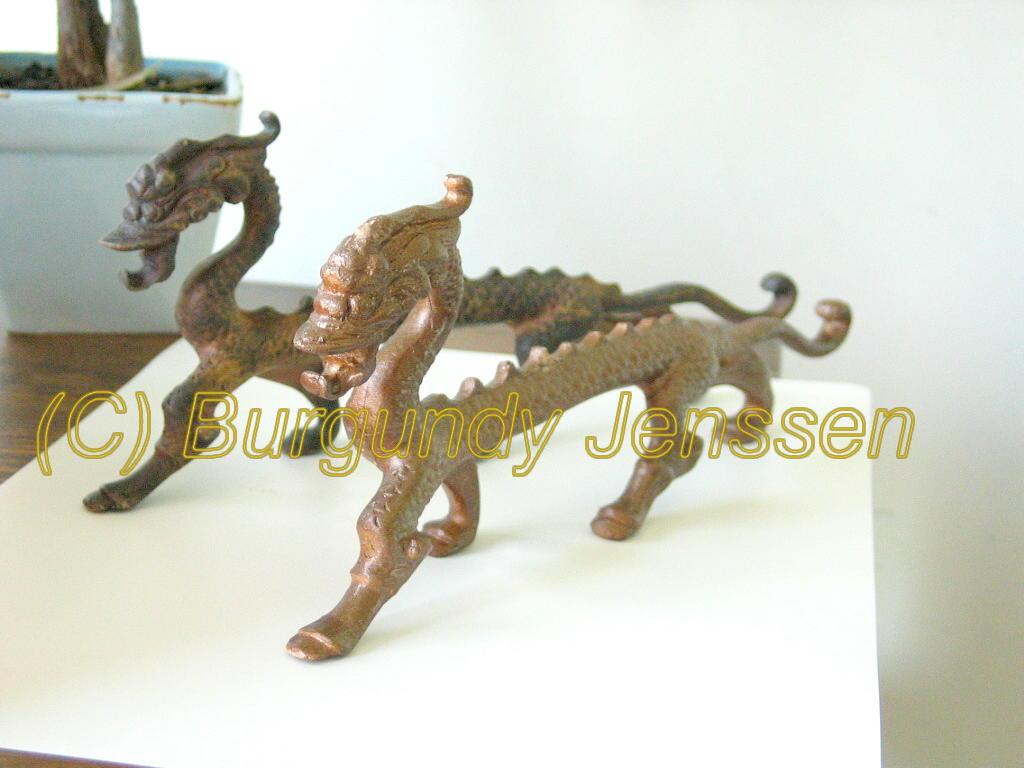
In 2010 I was surfing e-bay for a collie statue actually for my birthday present to myself and got side tracked looking at several dragon statues up for sale. Well I happened to stumble across this one.
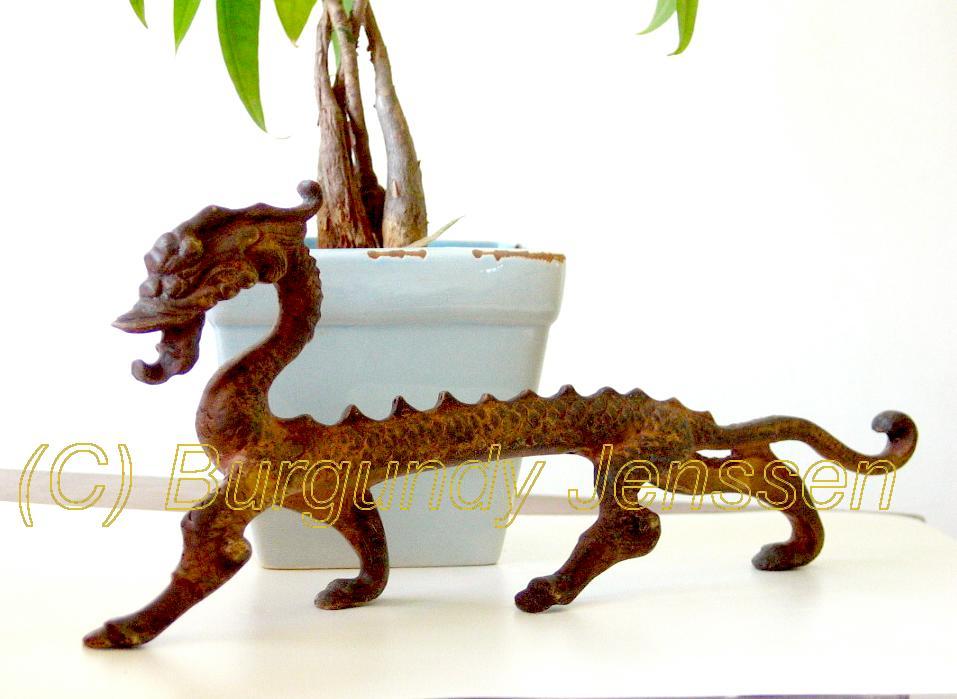
It wasn't bronze then on the aution site, but almost completely petina green from being outside apparently. It had a very familiar look about it to me and I liked it as I have always loved dragon figurines, so I purchased it from the auction site for my birthday present for not a huge amount, but what I thought it might be worth. A few weeks later it arrived in the mail safely and I opened it up and started to clean it up a little in the sink when I realized where I recognized it was from.
Look familiar? Try this video clip from the Voyager Episode "Counterpoint".
https://www.youtube.com/watch?v=cboBKUa36k8&feature=related
Around 6:00 and 7:20 seconds in you can see this dagron statue on the shelf in the Captain's Ready Room.
Since it is the only statue like this I have ever found, I thought, wow I have a special piece here and I want to make sure I always have a copy of it around. I also thought it would be nice to have two as book ends or to have a copy of it for the office at work. I thought hey, why not try making a plastic replica. So out comes the molding products....
First to make a rubber negative of the original, I coated it in serveral layers of a Smooth-On Casting Rubber called Rebound 25. I just painted on about 5 layers of the Rebound with a popsicle stick.
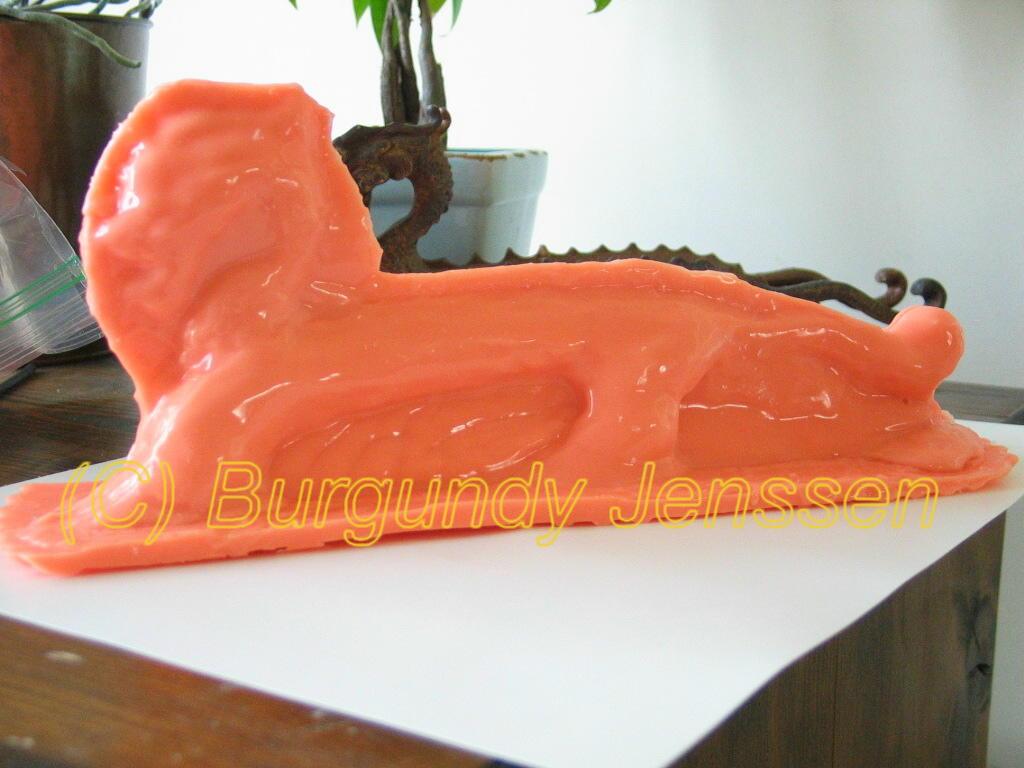
Once it was dry, I cut it down the back seam of the original bronze sculpture with a razor, being careful not to scratch the original. It was very difficult to get the legs out, so I cut a few interior slits in the rubber to get those out and not damage the mold or the statue. With a little light twisting, I got it all out.
Then to pour a two part urethane plastic, Smooth-Cast 300, again another Smooth-On product, back into the mold. It took me a few times to get all the air bubbles out of the toes, tail and head details. Finally I got a good copy, with a little flashing that needed cut off to clean it up.
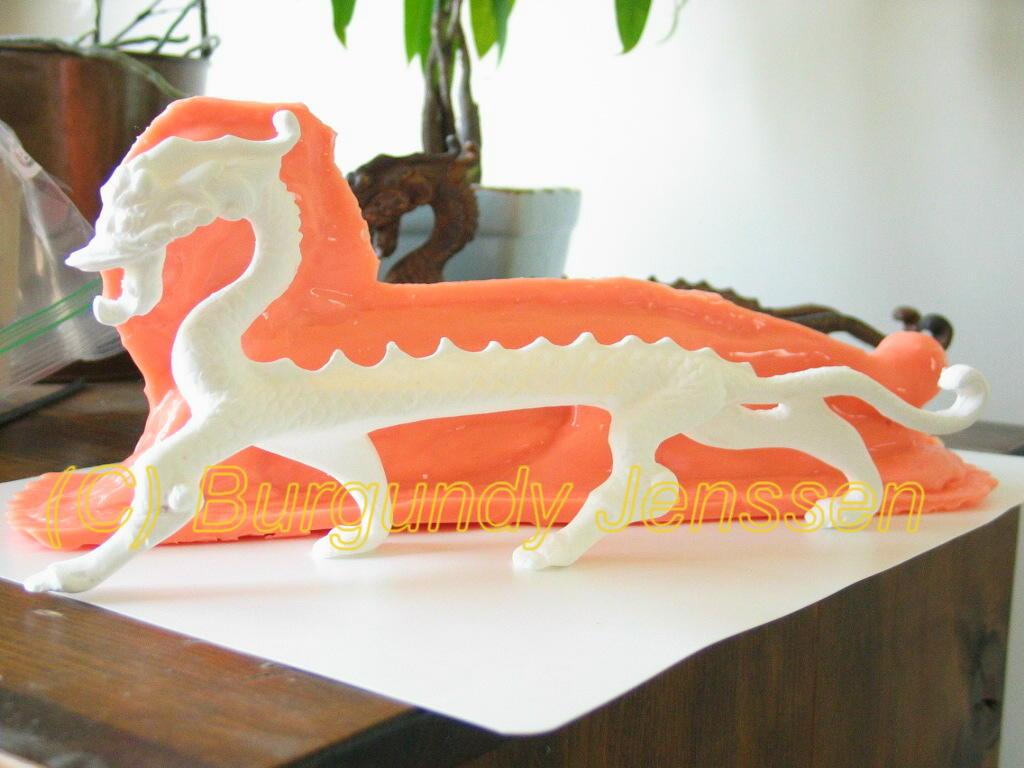
All it needed after that was is a little metallic copper spray paint....
Wow, it came out really nice with almost the same clean detail as the original. If I want to give it a weathered look I can always wipe a little dark brown flat stain over it.
Still, I'm pretty happy with how it turned out, so who knows, I might have to make a few more so I can have several at home and one at the office too. With the original mold, I can pretty much make as many as I would like now that I have the technique down. Not too bad for my first attempt at making a mold and a copy of a detailed figurine.
I don't really know if it is the set prop from Star Trek Voyager or not, but I can't find any trademark or corporate stamp on it that it was a mass manufactured piece. I can hardly believe that someone would make a brass figure as a custom piece for a TV set, but I could be wrong. I suspect it is a replicated figurine sold by some company out there. If anyone does know if this was a "custom made" piece for the Voyager set I would love to know. Drop me an e-mail if you have any details.
My Next Project:
A complete costume of the Cheshire Cat, from Tim Burton's 2010 Version of 'Alice In Wonderland'.
Ambitious? Naww...what gave you that idea?
Here's a screenshot of the Cheshire Cat from the Movie:
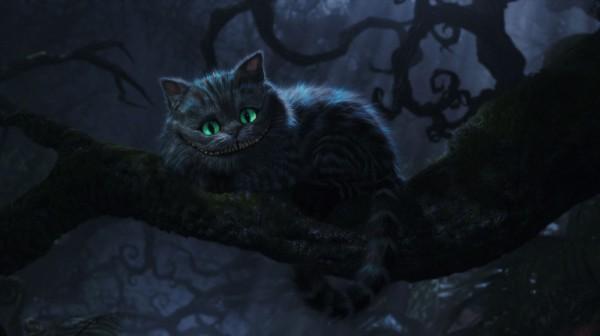
Now you know the standard of excellence. Of course this is a CGI character, so making a costume will require some creative license to make it fit on a human performer (namely me for the moment, but I might be willing to sell the costume later). I do like to make my costume as realistic to the model as possible.
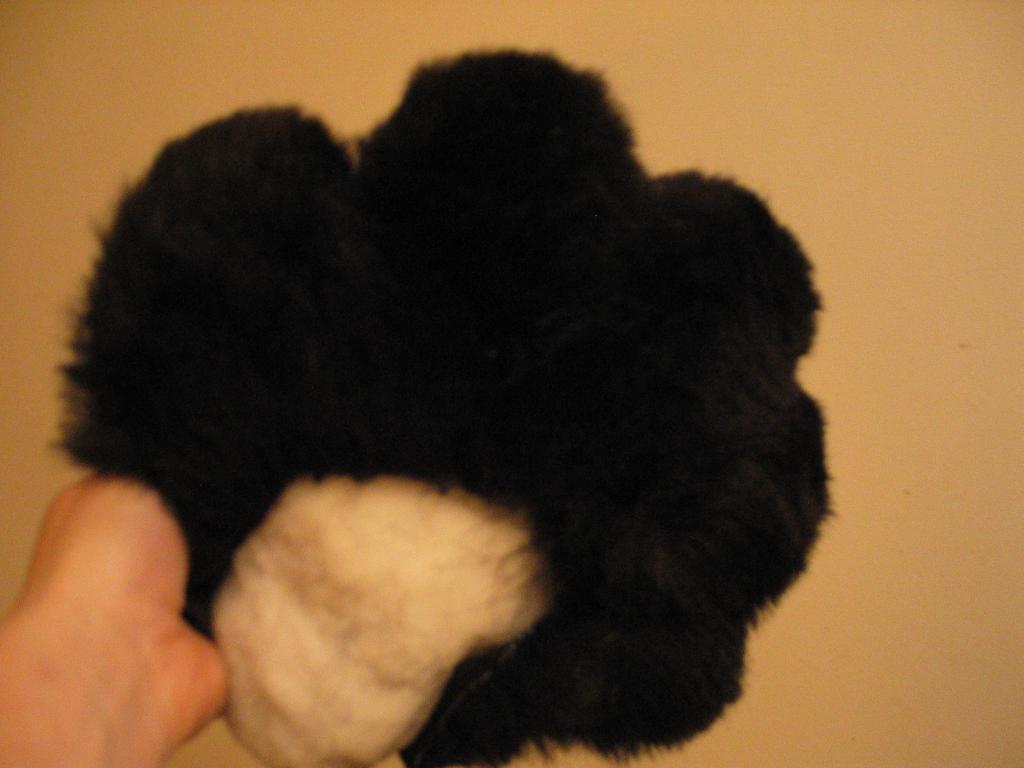
To shape the costume to look more cat like on a human skeleton will require some foam padding. So to start with...make the paws. That's easy enough. A glove, some dense polymer foam, and time with sharp scissors.
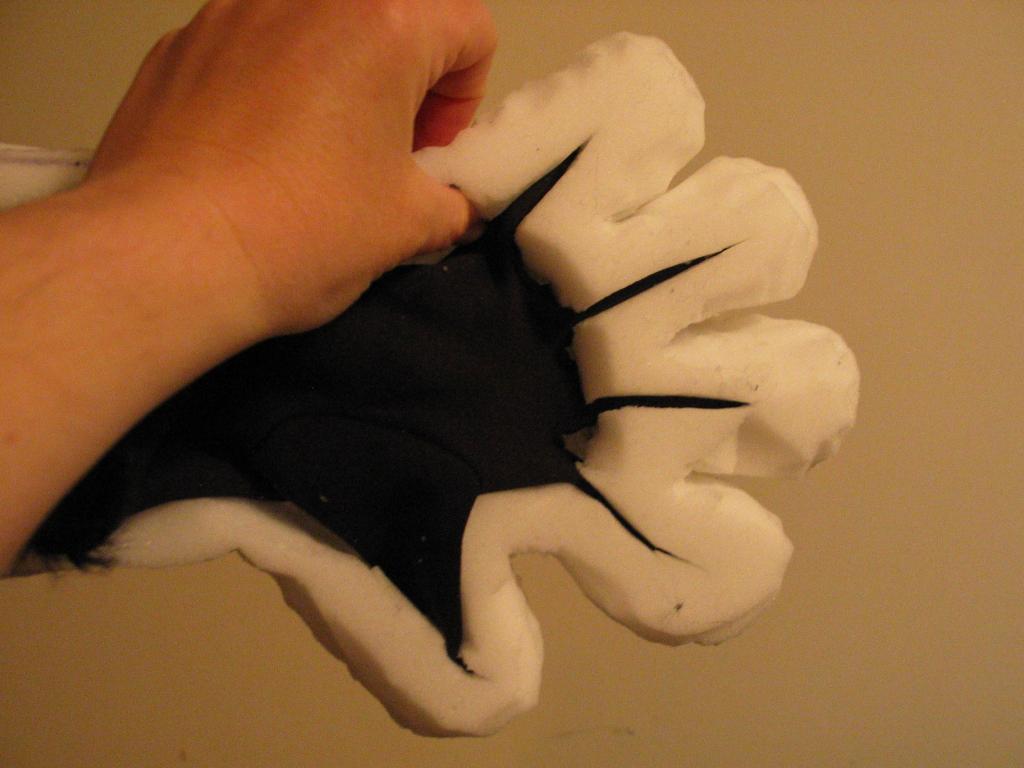
Then to find the right "fur" for the black paws and tail tip. Easy enough. Stich on some long, black, feather-fox, teddy bear fabric. It will need a hair cut to shape the toes out properly, otherwise it will look like Chebacca!
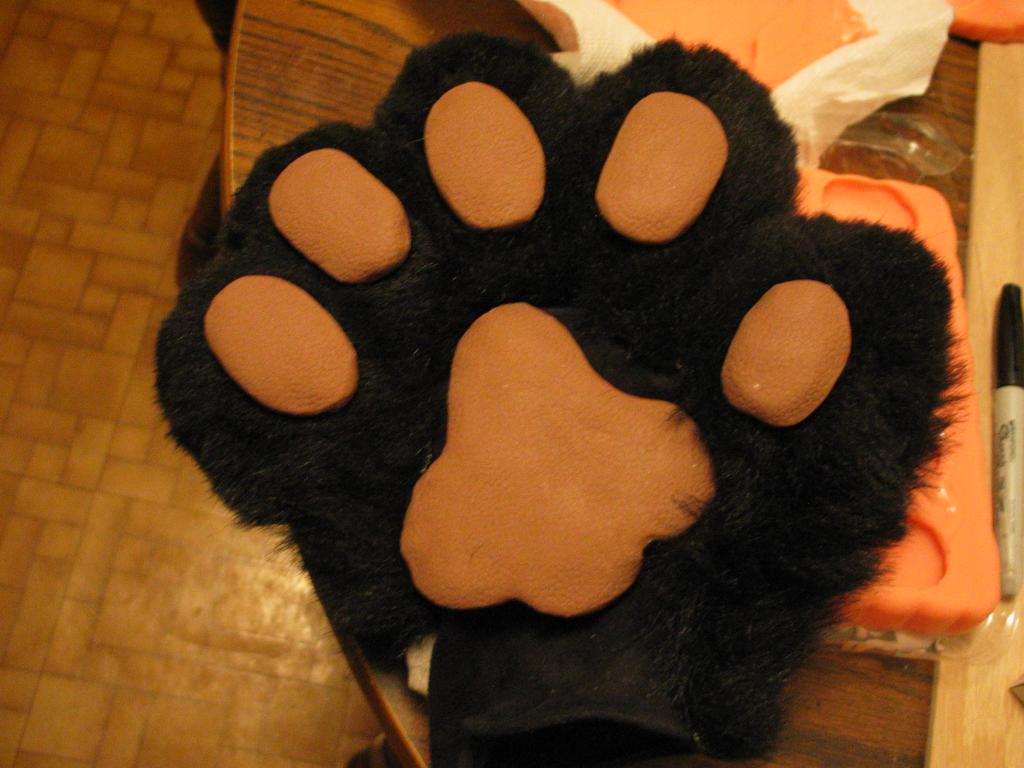
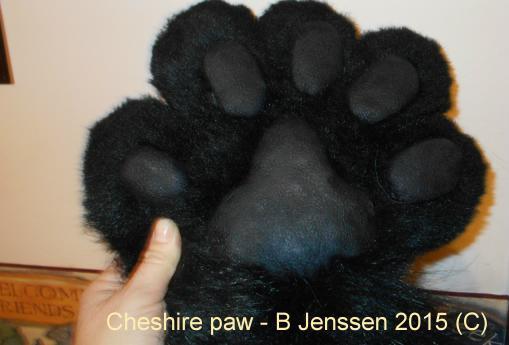
Then we need authentic paw pads. Those have to be custom made to fit, so out with the clay, then textured to look like a real cat paw pad. These are the clay forms just put on top of the fur in the appropriate places, so the paw pads show up on the black fur for this photo. (You can see the final mould in the orange form under the paw there in the photo below). The final paw pads look exactly like the brown clay forms, only they are a black pigmented silicone, stitched and glued to the correct positions.
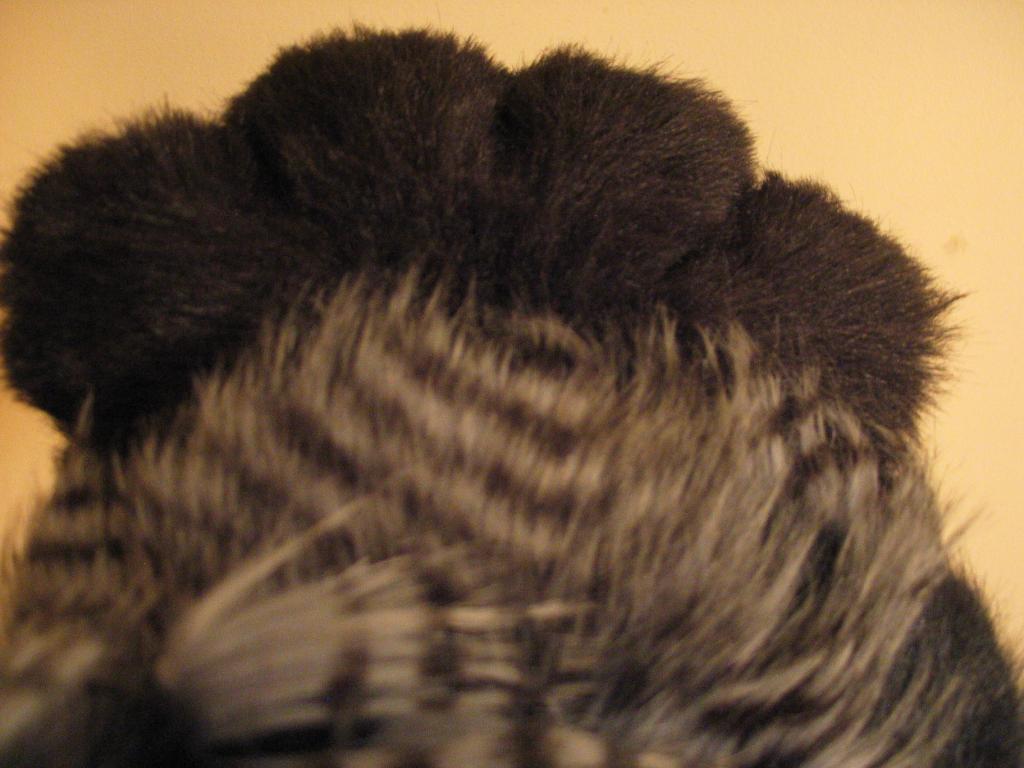
Then the blue-gray and black tabby stripes. This was not an easy to find long fur fabric. I had to order from an overseas fabric provider and it came only with the black patches in it. So yes, I'm cutting the tabby strip patches out with a razor blade on the backing (the only way to cut fur fabric properly) and stitching them together one patch at a time to make the continuous tabby stripe coat. Isn't that time consuming you ask? Yes, very!

Put the two fabics together onthe foam and now we have one complete Left Front paw.
Now to make the other three paws! The rear feet will actually be put onto a soft canvas shoe with a thin sole and velcro straps to tighten the shoe and keep it on. Making the cat's hock area look real and the bend to knee area for the rear leg look real will require more creative foam padding on the body suit to "round" out the cat leg on a human frame and give it a little fluffy-plush toy look.
Yes, the full body and tail also have to be shaped, patches cut and sewed (by hand), and then probably some neon blue airbrush fabric paint will be added to make the neon blue stripes stand out at the accent points like the CGI character.
The head will be sculpted in clay and then cast in a plastic resin so that the jaw is movable to create that classic "Chesire Cat smile" with a set of acrylic teeth to make the creatures from "Critters" envious! Then the plastic head form will have to be custom fit with fur and paint accordingly. I am custom making the eyes at about 2-1/2" in diameter out of "ice" resin as well and painting them. I hope to add 1 mm - LED lights to the eyes and teeth to make that famous cheshire cat smile light up the night. We will see how far I do get on it this year.
More photos to come as I get time to work on this. I actually started on this costume in May of 2012 and I sort of hope to finish it in 2015. It is not an easy project to say the least. I do have a full time day job and I'm taking classes at night, I haven't had a lot of time to work on this and maintain my house, yard, and other day to day items.
Along the way, I've been side tracked by some other projects.
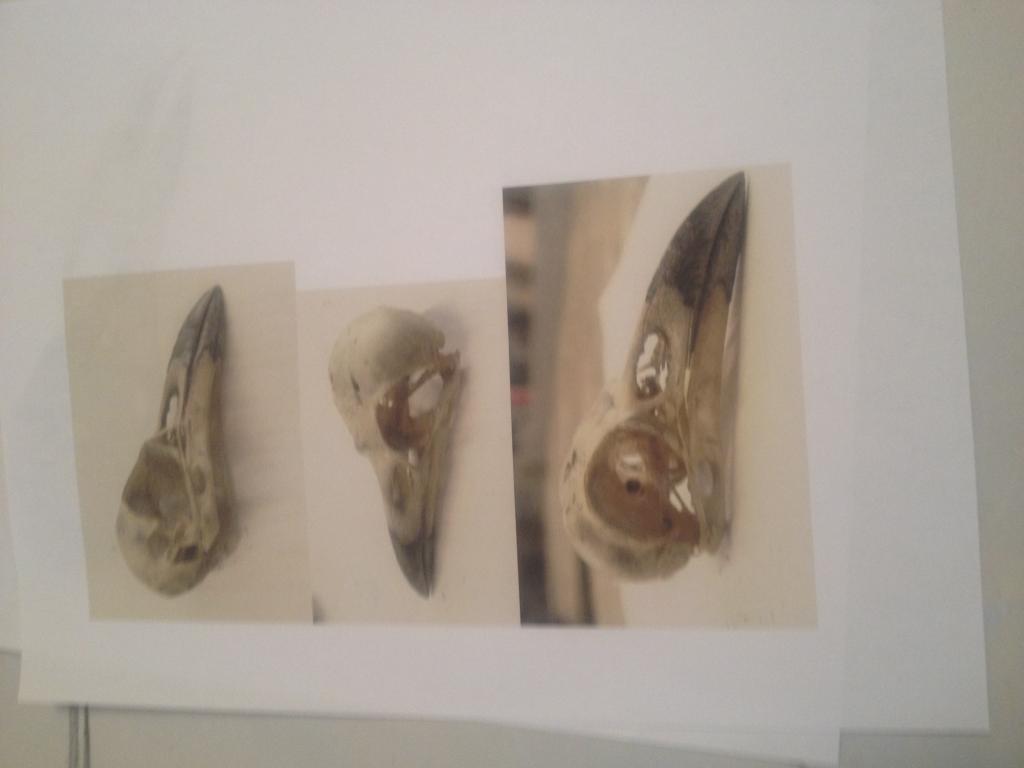
The latest is making a few Raven skulls for Halloween Costumes. Since crows are Federally protected, it's not like I can just go find a Crow or Raven skull to copy. Besides, the bone structure of a real skull is very delicate and wouldn't stand up to daily wear on a costume or display. Here's a few photos of a real Raven skull.
The next best thing to do is actually sculpt the skull from clay and use a little creative license to add some thickness in areas that would break if they were made anatomically accurate to a real skull. So that's what I did. My first attempt at sculpting any type of skull from just looking at some photos.
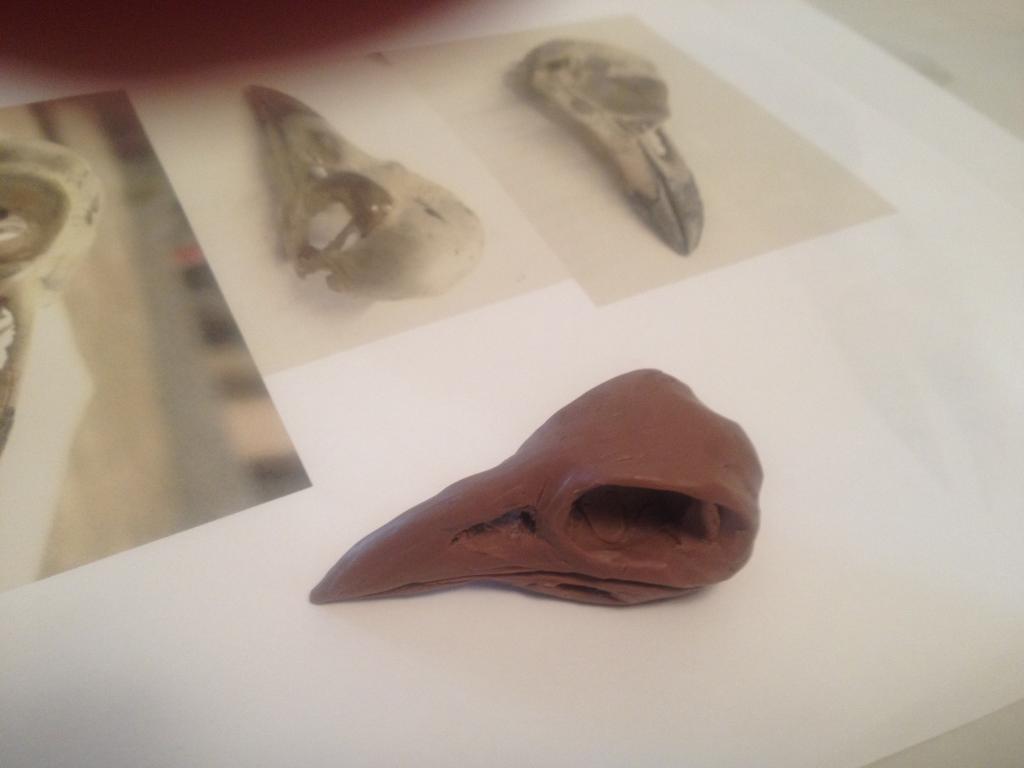
Once the sculpture is done, the next step is to make a negative mold of it using some Smooth-On Rebound 25. That is the orange plastic in the bowl below. Rebound is a Silicone rubber that is rigid enough to holdup to a lot of twisting and pulling to get a piece out of it, yet flexible enough to fill in the deep undercuts in this clay sculpture. Once the Rebound is set, the original clay is cut out of the mold to free up the negative space to pour in the urethane plastic for the final piece.
The final piece is made from Smooth-On, Smooth-Cast 300, a two part white urethane but pouring it into the negative made by the empty areas in the Rebound mold left when the clay is removed. Once the white cast piece is out of the mold and let rest 30 minutes to cure solid, it is just time to do some distress painting on it. I made 4 of the skulls in about 2 hours in-between doing other things around the house.
Then just some flat Testor Black and White enamel paint with a little flat Tan or Yellow slipped in there stippled on with a paper towel to make it look old, weathered and distressed. So that is what I did and the outcome is shown below. I have to say, I am rather pleased with this first attempt at a totally custom piece.
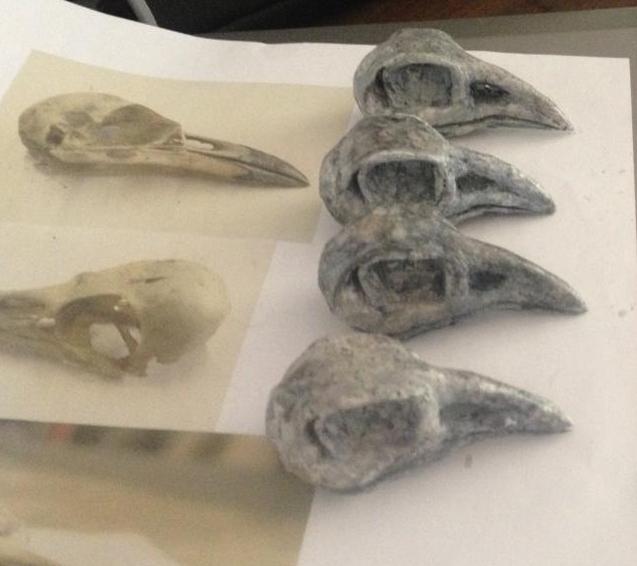
I will have to work on the shape of the bill a little more on the next time around as it's a little too short and too sloped, more like a small bird of prey or a Hoatzin (if you don't know what a Hoatzin is, then check out this link http://skullsite.com/completelist/speciesinfo.cfm?spec=1167 or this one http://en.wikipedia.org/wiki/Hoatzin...they are a rather unique bird) more than a real Raven. I think I pressed it down in the bowl a little too much when making the mold, which bent the bill a little more than I intended. For this first attempt at sculpting any kind of skull, it is ok.

Then to set the skull in a little Apoxie Sculpt Black and wait 24 hours to have it all cure solid and I have a lovely ring ready to wear for Halloween.
Now I just need sell the other 3 skulls so I can afford to buy a little more material for the next project.
I still don't plan to quit my day job just yet, but I'm thinking I might be able to make a business of this type of thing.
January 2015
So I've had some inquiries on how I'm doing with the Cheshire Cat Costume. Here's some photos of what I have done so far. It's very slow going with my regular "day job" at this time and the fact I keep getting sidetracked with other small projects.
The front paws are both done. Here is the detail of the paw pads.
The shoulders are done with some of the suit going down the mid-part of the back. Yes, it does sort of look like a jumble of blue-gray fur at the moment, but really when it is brushed it looks nice. Once I airbrush more solid black stripes on it for the tabby markings it will look good.
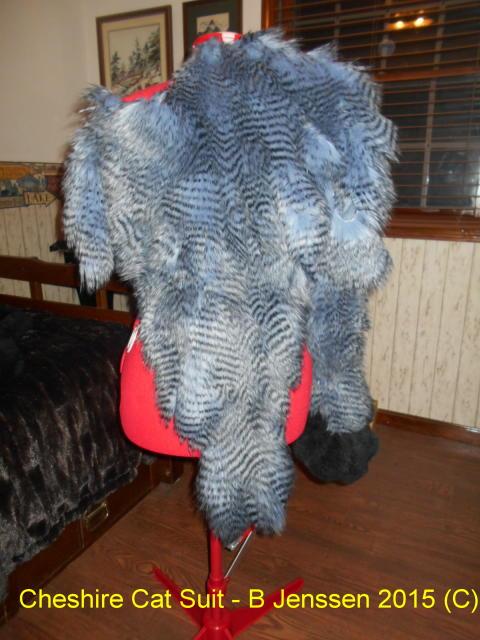
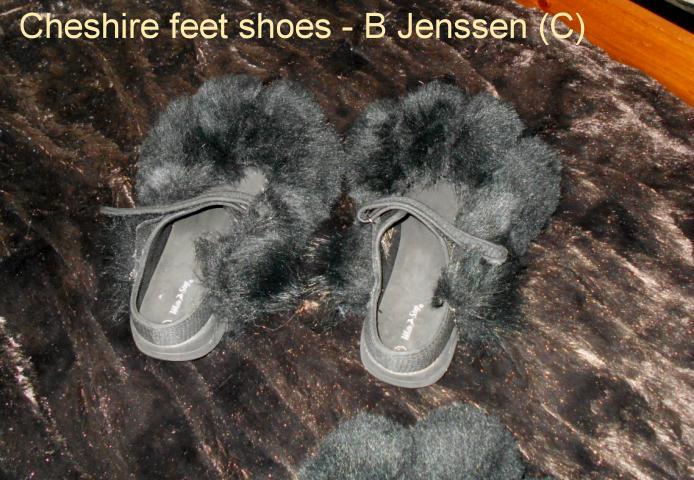
The feet shoes are started along with part of the tail (not shown) are well underway.
I need to do a body pattern next to start working on the padding for the hocks that fit into the shoes here and the legs and hips for the suit to make the padding under suit pieces that will make it more "stuff animal" looking. I just have not had time to wrap myself up in duct tape yet to make a pattern. Oooh that sounds sooo wrong....
Seriously, the best way to make a pattern is to do it from a painter's coveralls and duct tape. Then you cut the pattern off from the painters coverall and duct tape and use it to make a totally custom body suit.
In the mean while, I've been fascinated by many of the props from the 2014 movie "Maleficent". Enough so I had to experiment with some materials to try to make some copies.
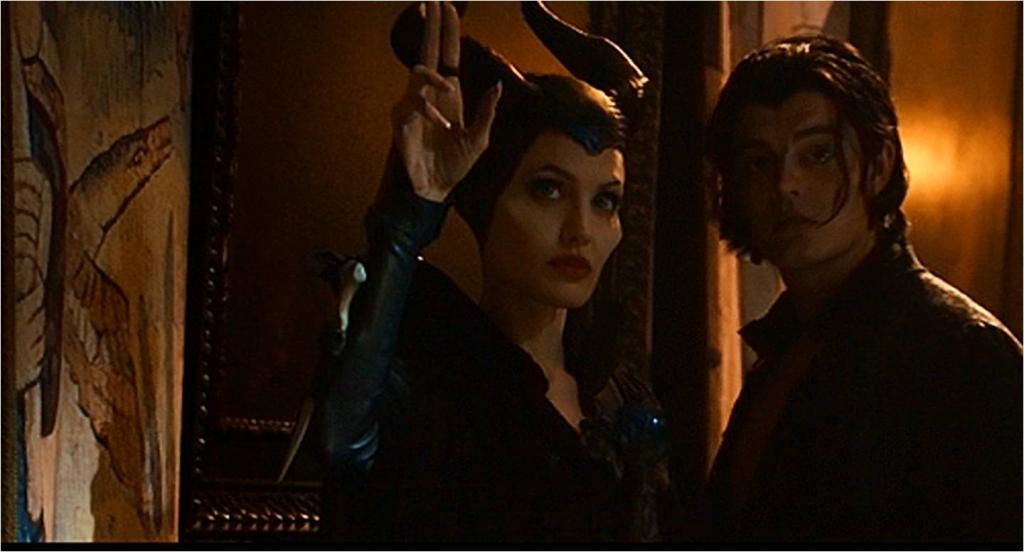
Here's the first one...the Ceremonial Bone knife Angelina Jolie is wearing on her right arm as part of the final costume set "battle suit".
This is a screen shot image from my copy of the DVD. I cropped it to show the handle of the knife and approximately how long it is. (No copy write infringement intended, it's for visual comparison).
So here's my version of it.
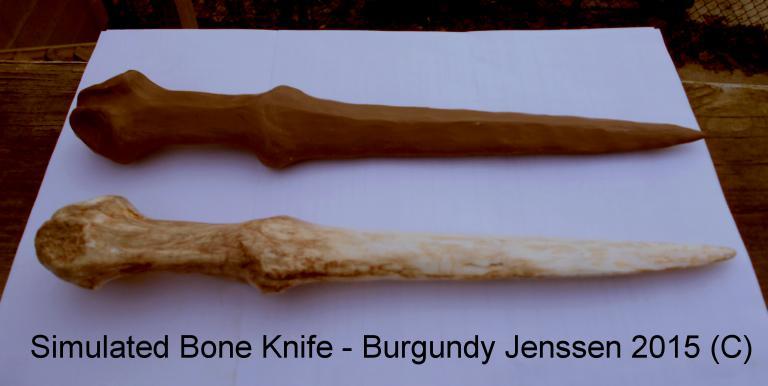
The top image is the Monster Clay sculpture I did from looking at the above image and a few images on line of various other ceremonial bone daggers made from Cassowary shin bones. The bottom image is the actual piece made by casting the clay sculpture in Smooth-On T20 Mold Silicone, then casting the final piece with Smooth-On two part white Urethane plastic. To finish it off to look like real bone, it has been stippled and washed with some Testor enamel paint in flat white, flat yellow, flat tan, flat black and gloss brown. Sorry the photo isn't in great light, but the detail is so life like even I look at it and it looks like REAL bone. It's not....no animals harmed in making this at all.
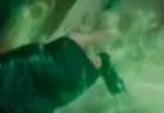
Then I had to take on a real challenge, the Christening Ring. The "Maleficent" Blue Ray DVD disk has some extras on it which shows in details some of the rings made as props.
Here's a photo of the Christening Ring which I projected onto my wall to see in better detail.
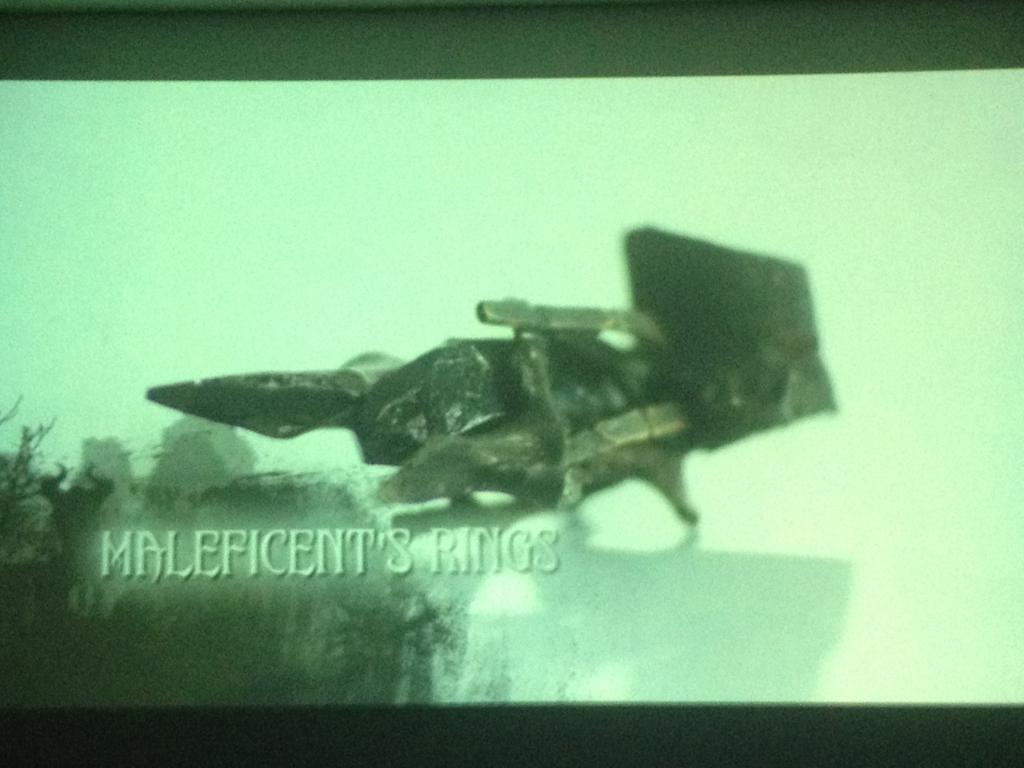
The photo isn't great but you get the idea. This ring is very abstract. It looks like a 6 sided black obsidian gem stone set inside a brass "cage" which sort of looks like toe-bones from a small animal or bits of knots from wood as "wings" at the top of the cage. There is an ostrich type leather used to support the ring on the finger, as overall this ring is large and sort of heavy.
So here's my first version of it, made entirely from Apoxie sculpting medium.
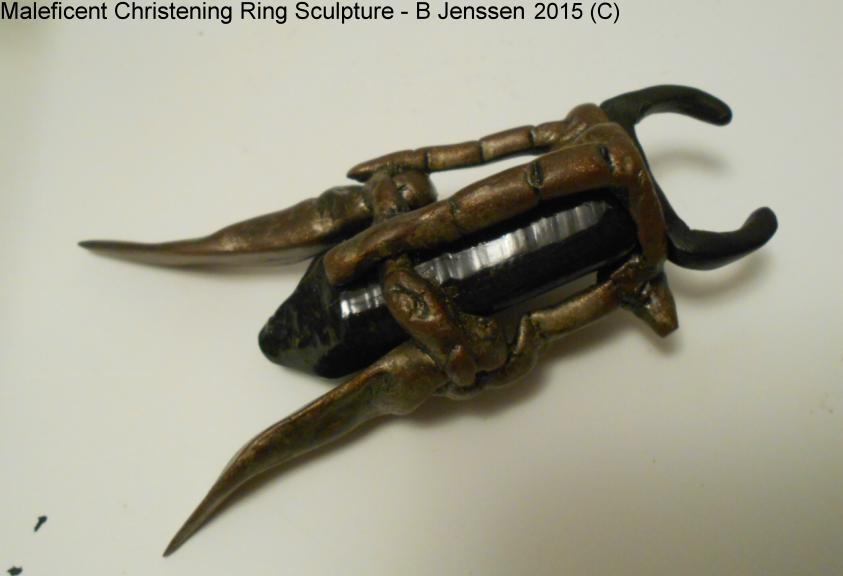
I sculpted the obsidian stone with black Apoxie into a "brick" shape and let it dry solid. I then cut it down to make the facet sides and off set tips with a razor. Once I shaved the facets down, I polished it with a fingernail polish brush and then glossed it up with a dremel buffing tip. I intentionally didn't take all the rough cut defects out of it as this is supposed to be sort of a "natural" stone. I then painted it with a high gloss finish and let the stone dry.
The "cage" around it is all sculpted with "bronze" Apoxie which I propped up around the stone on the main cross bar to dry so the stone fits very tight into the "cage". Once dry, I then sanded it to roughen the surface and sprayed with metallic copper and gold spray paint. Then I sanded again with very fine sand paper and wiped Minwax Ebony wood stain all over it to "age" or "distress" it to the proper weathered bronze color. I then spayed it with a satin finish to make sure the paint job holds up to a little use. I added a black finger piece out of Apoxie to help hold it to my finger and wrapped that in a piece of simulated ostrich leather (Not shown).
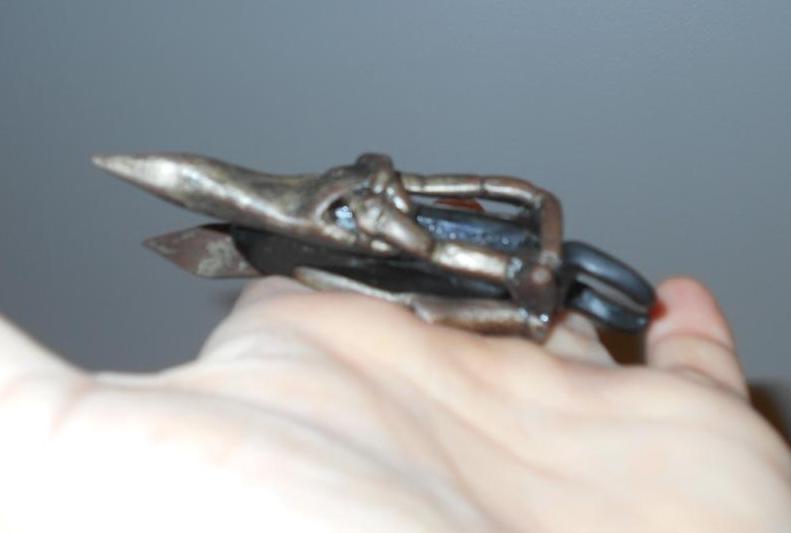
I think it came out beautifully for a first attempt at it from only the photo of that ring from the DVD. I'm really happy with the stone, but I might make the "cage" part again to "flatten" the pieces a little more and make them a little more "metal" looking instead of rounded off. Hey for a first time around... it's very usable. Just so you get a sense of the scale, here's a photo of it resting on my hand. It's large, but pretty close to scale of what is in the movie. It's about 3/4 the length of one of my fingers. That looks pretty close to the real deal.
So now I have this beautiful Labradorite "egg" I purchased for Christmas.....
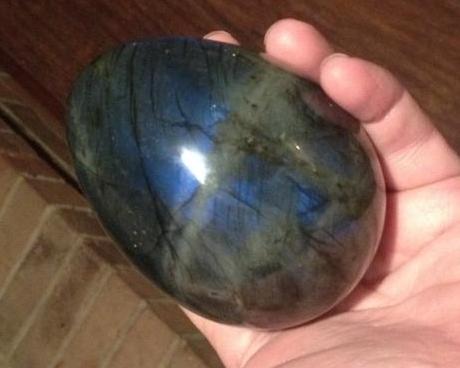
If you know anything about labradorite, you would know it exhibits it's own "luminescence" called "schiller", when light is shown on it. Essentially it "reflects" the light from the inner part of the stone like a diamond does, but in various colors of blue, green, yellow, silver and gold.... There is no artificial light inside this solid piece of stone. The brighter the light shown on it, the more intense it reflects that light.
Hmmmm..... So now, I'm thinking, it's time to make that Staff! Then I might have to try my hand at some shibori work on some black silk, about 40-50 yards of it, and a big leather collar, some Monster Clay horns cast in Onyx Smooth-On.... Maybe I'll get back the "Cheshire Cat" next year.
October 2015:
Sometimes it's easier to make something you can just sew....
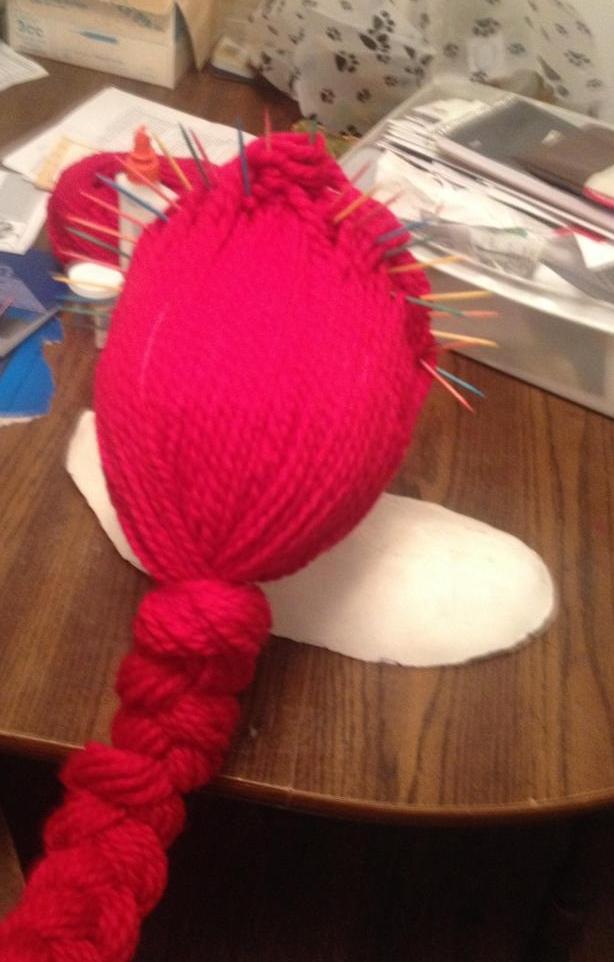
So I made "Jessie" from Toy Story as my winning costume for 2015. Yes I did win 1st place at our work costume party and I might use it later for another contest...
First you have to have great "red yarn" hair

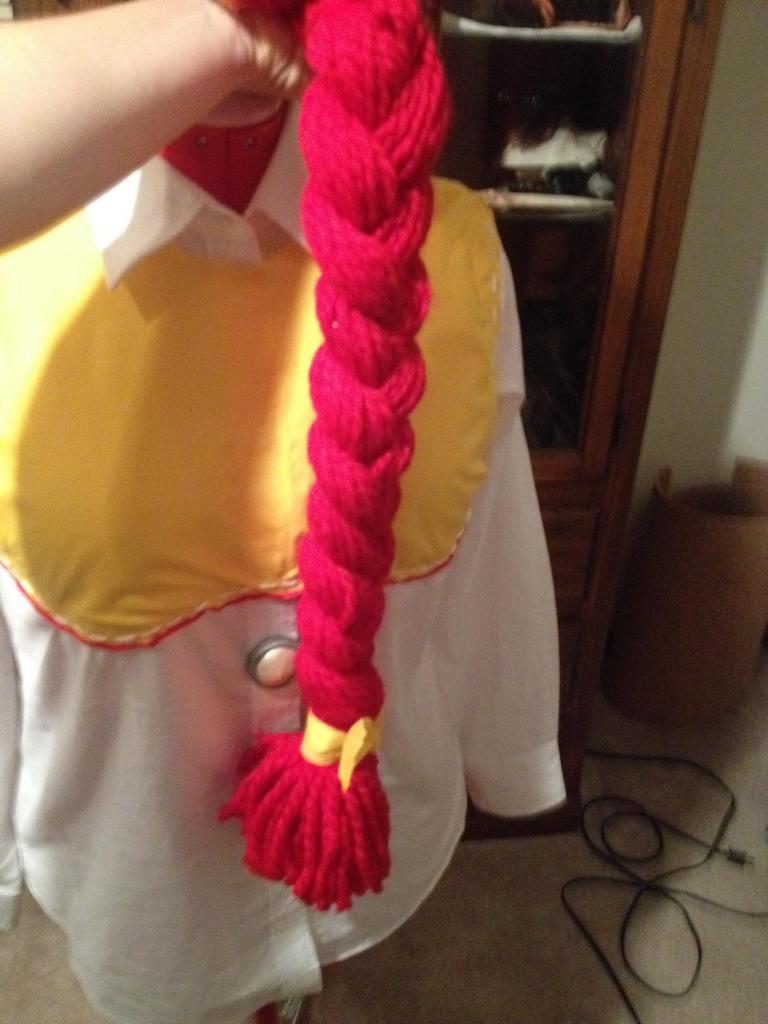
Complete with yellow bow!
Some custom glove gauntlets with custom pearl inlay buttons...
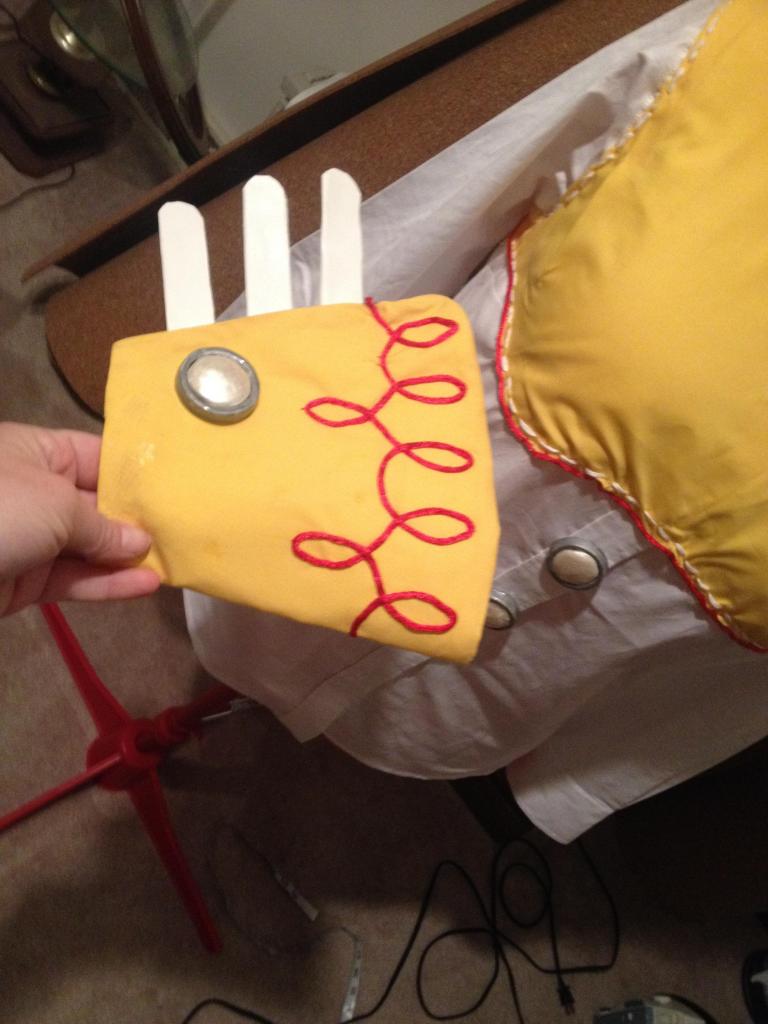
Hand stitched red ribbing and a working pull string..
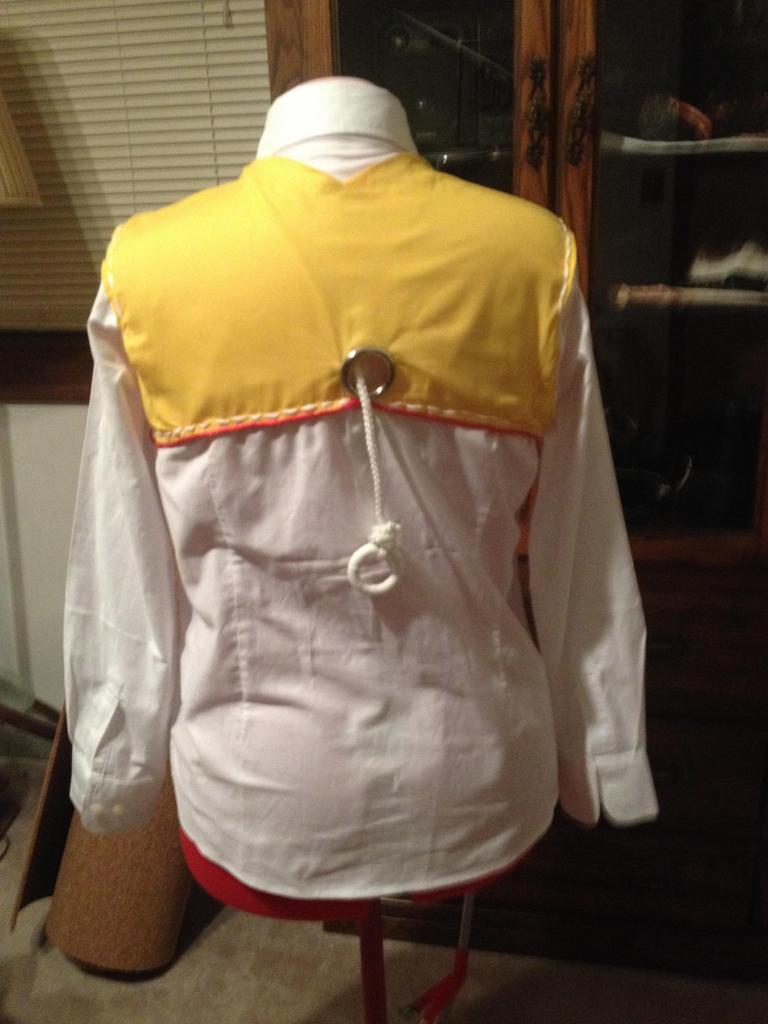
and cow hide chaps complete with white stitching...
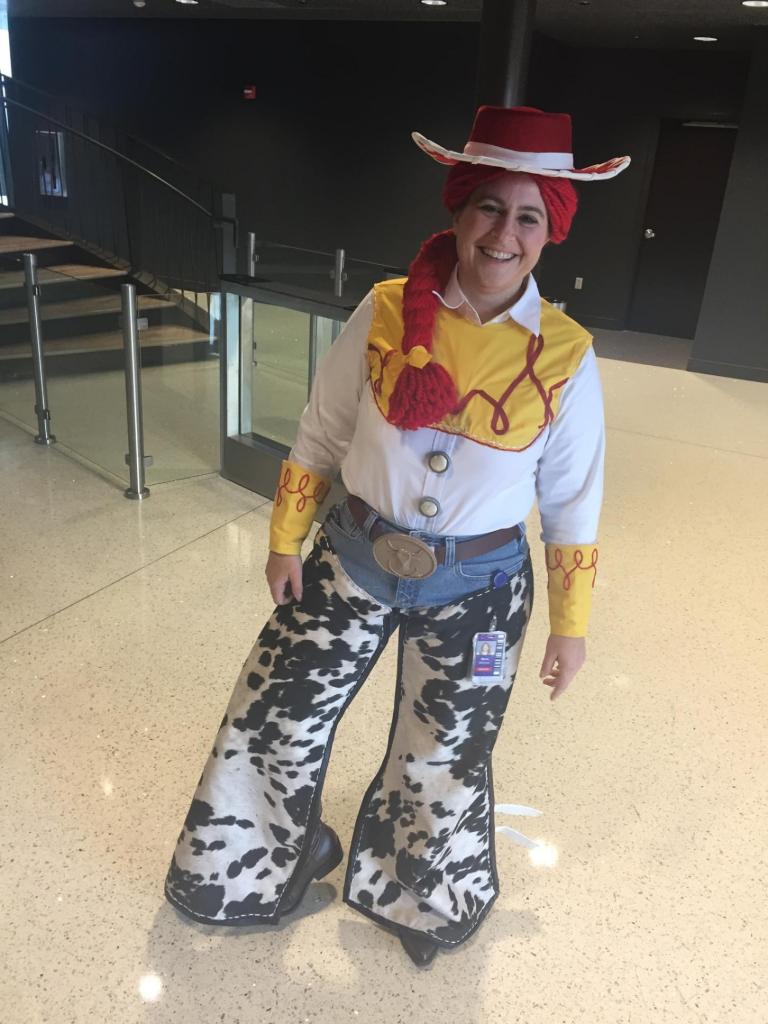
Custom Belt Buckle and Disney approved Toy Story cowgirl hat,
and there you have it...Jessie!
Update December 2016:
Yes I'm still working on costumes...and Cheshire Cat will have to wait a little longer. I've been having problems finding suitable materials for Chess's head...so this year it was the "white knight" from Tim Burton's Alice in Wonderland. I had a chance to give making armor with Sintra and Worbla a chance. It was actually faster to make than I thought and came out really great. Here's the progression:
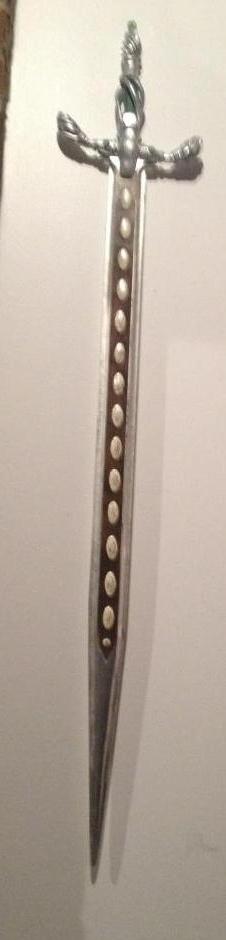
First...you have to have a great vorple sword! Starting with a old pine board...
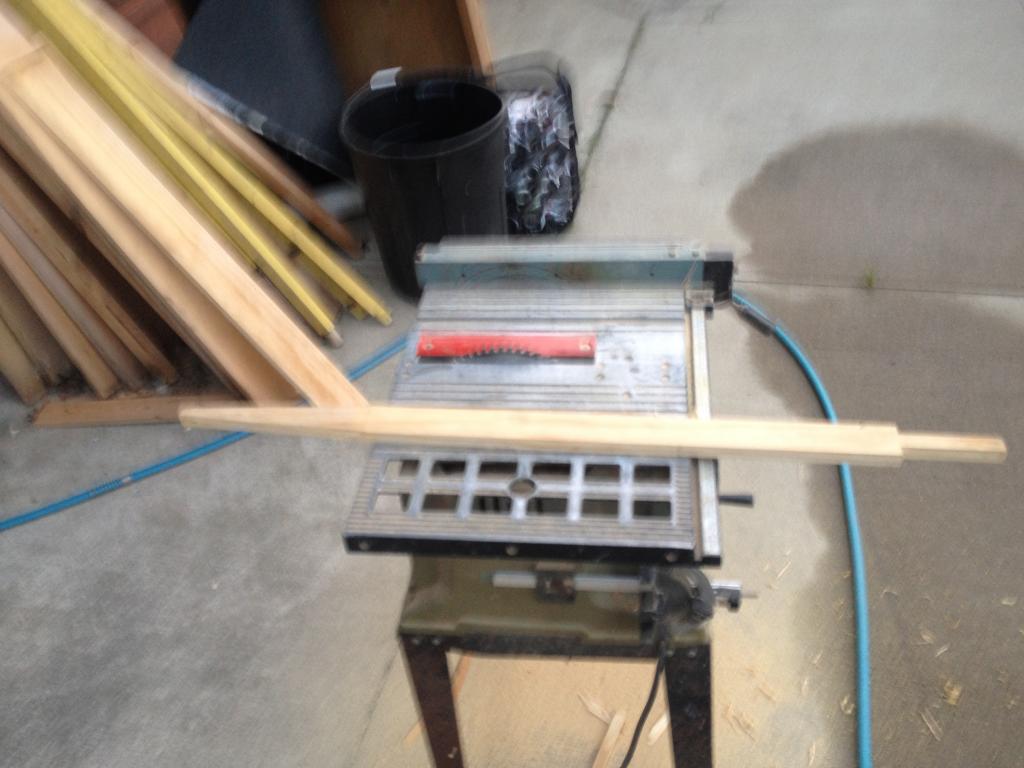
Cut out as a blank and routed on the edges to bevel out the blade....
Then some plastic handle pieces shaped from clay and cast....then attached with Apoxy Sculpt...
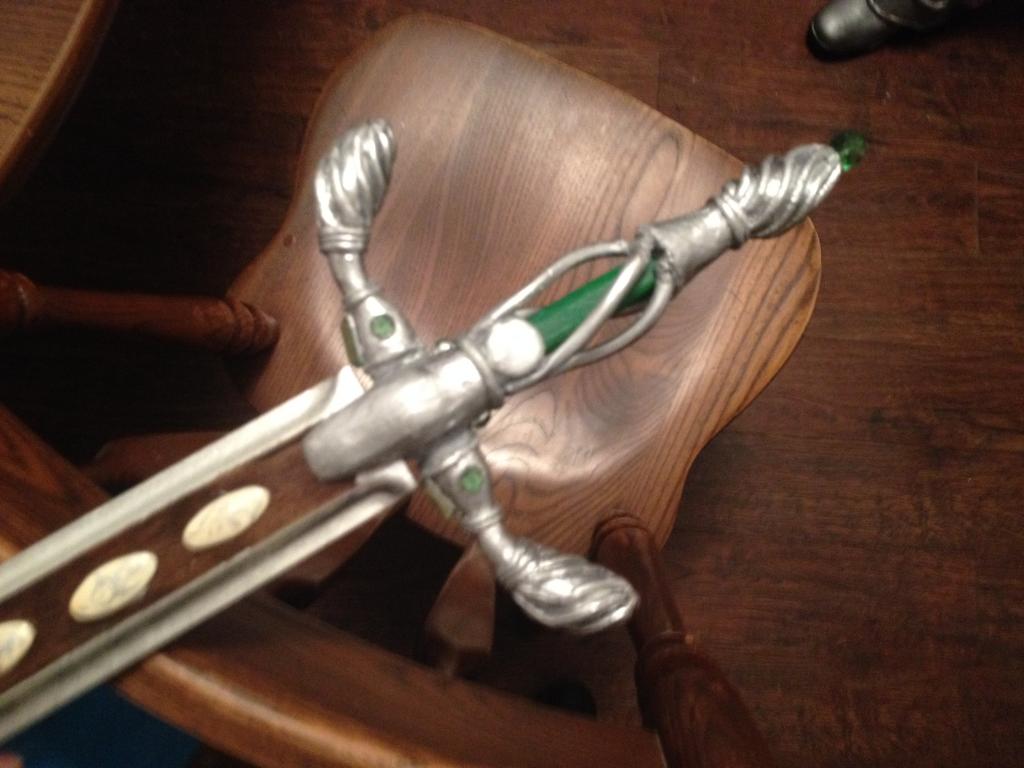
Then all covered in silver gilding....
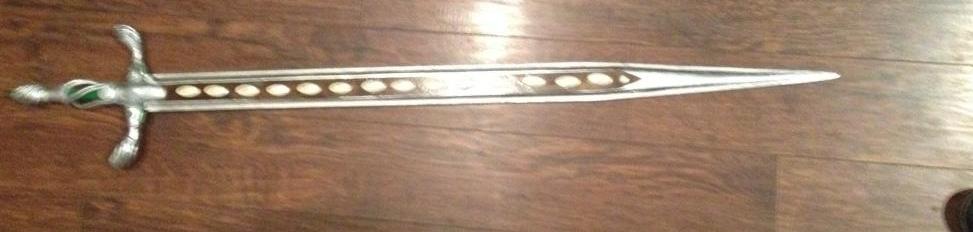
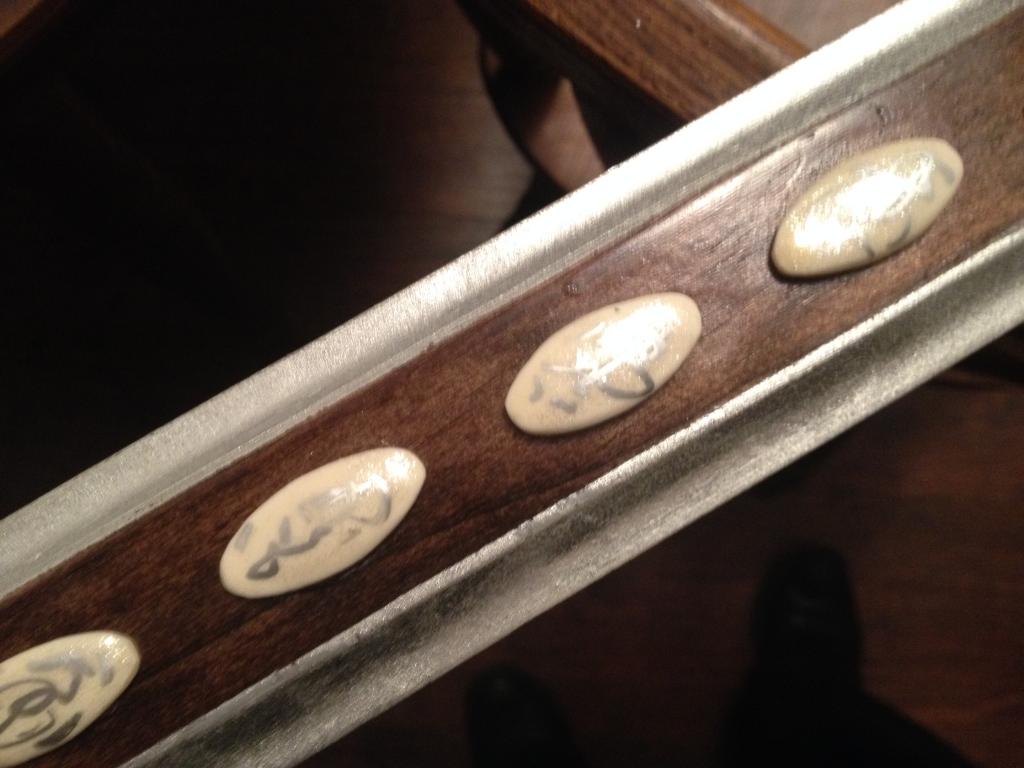
Some detailed simulated pearl inlay items....
And you have something really close to the real prop used in the movie shown here for illustration purposes....
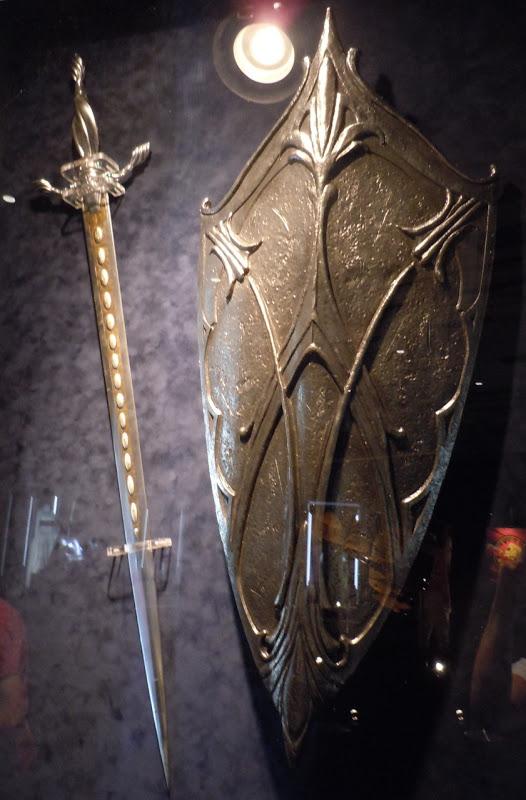
....... Movie Prop..... ...My reproduction.....
Pretty darn close....
Then the armor is needed...
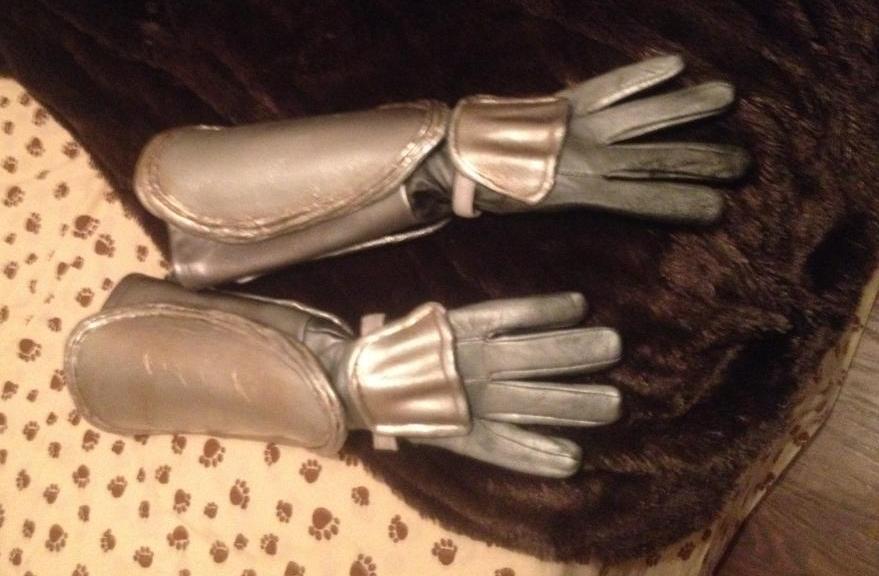
Gloves and Gauntlets....
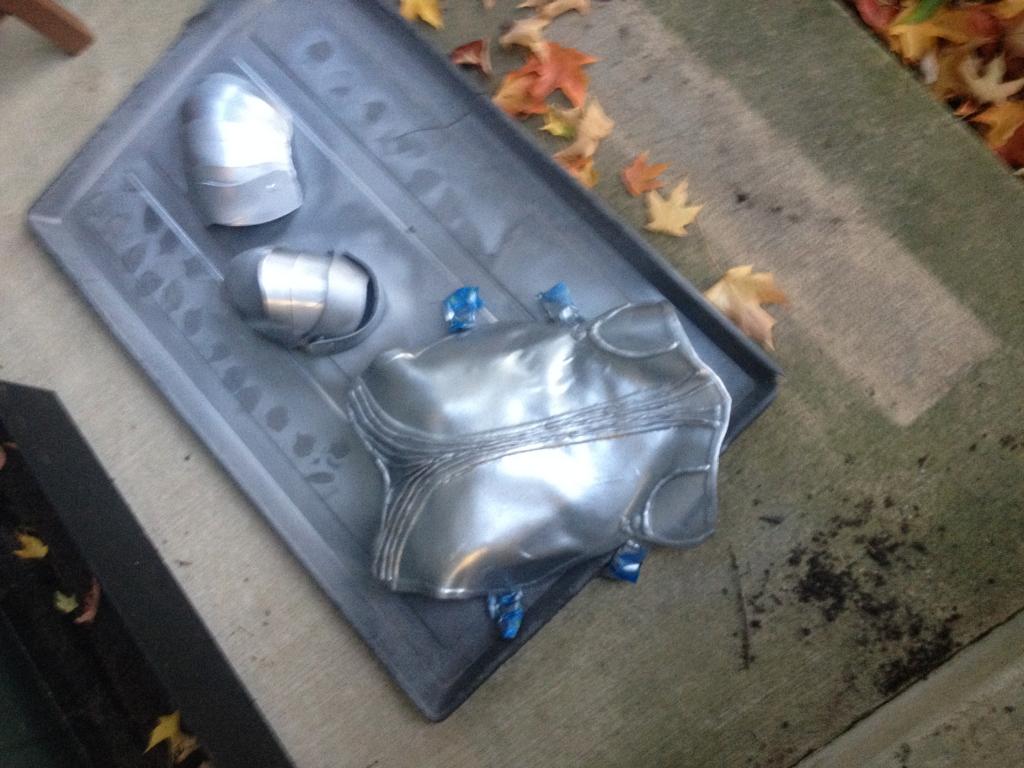
Chest Plate and Shoulder pieces....:
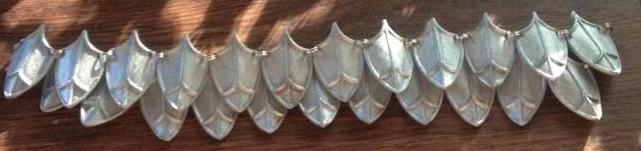
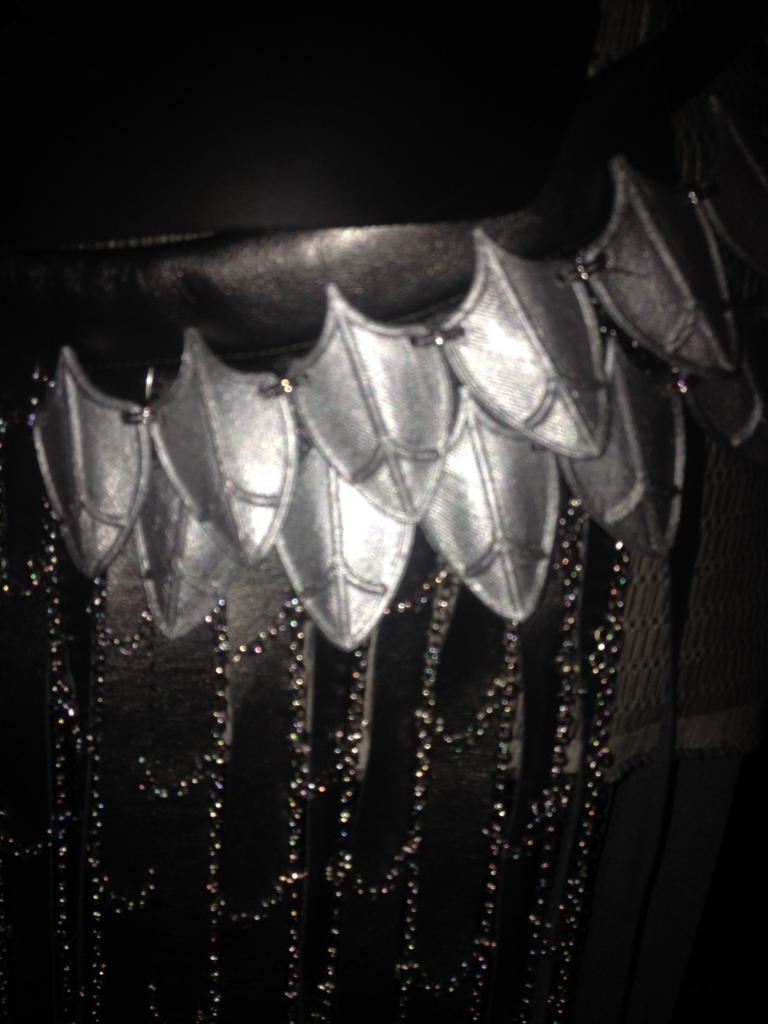
Chain Mail and Leaf pattern pieces....
A big shout out to Perry Cain for helping me to 3D print these leaves!
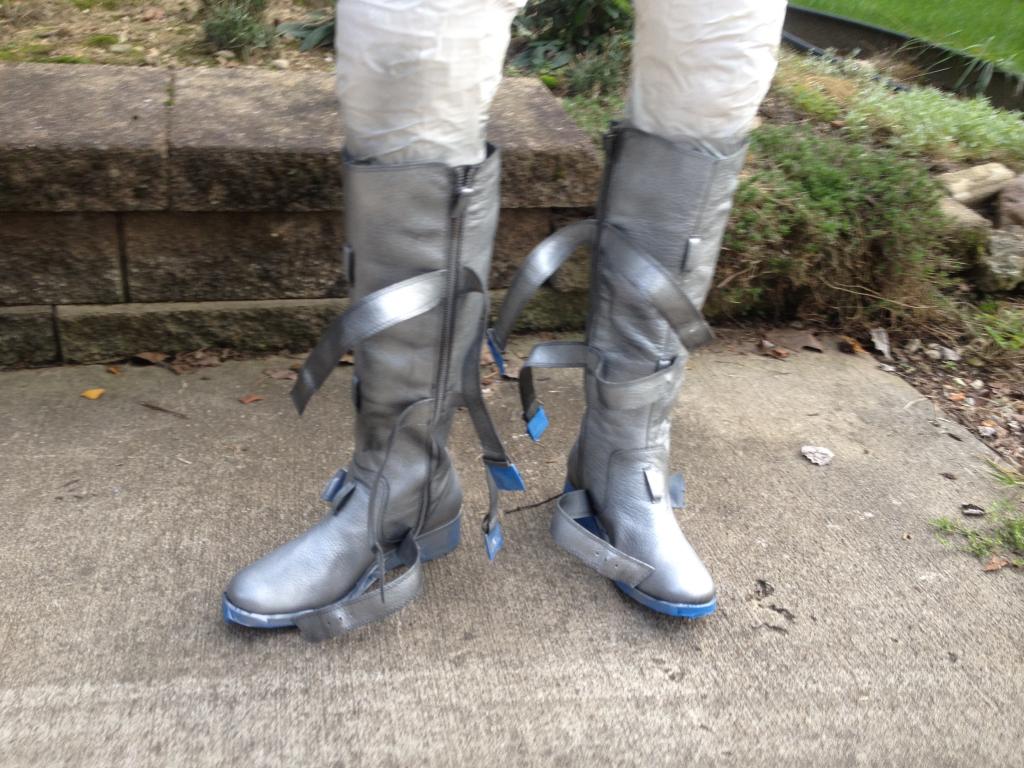
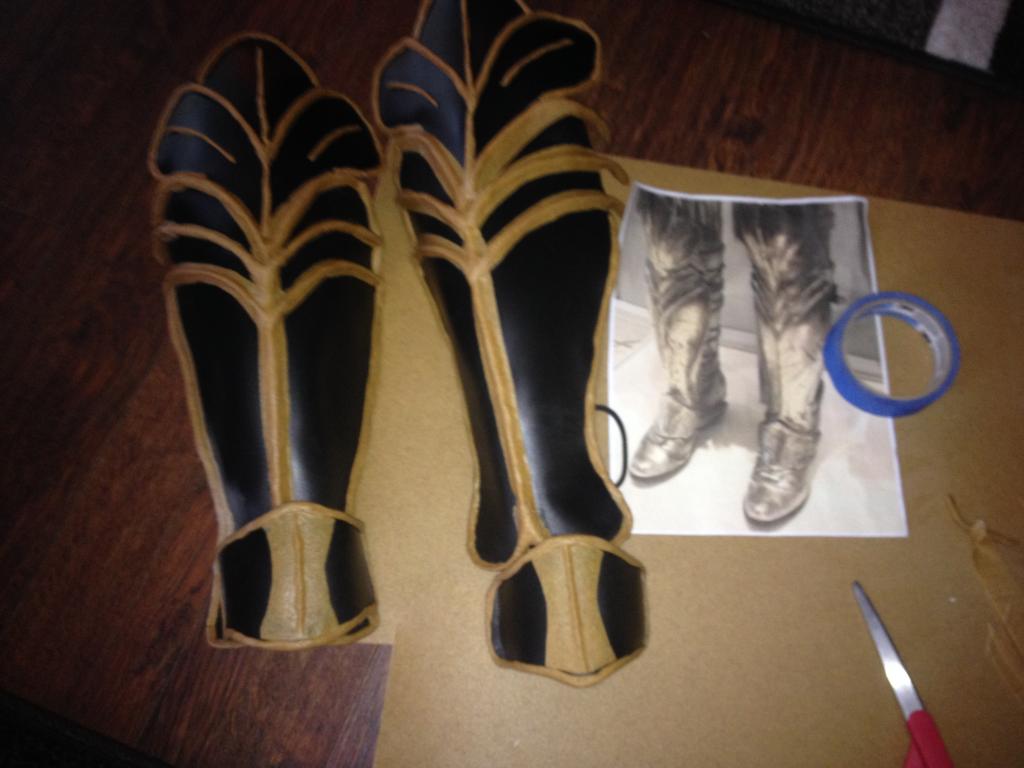
Then boots and shin guards....
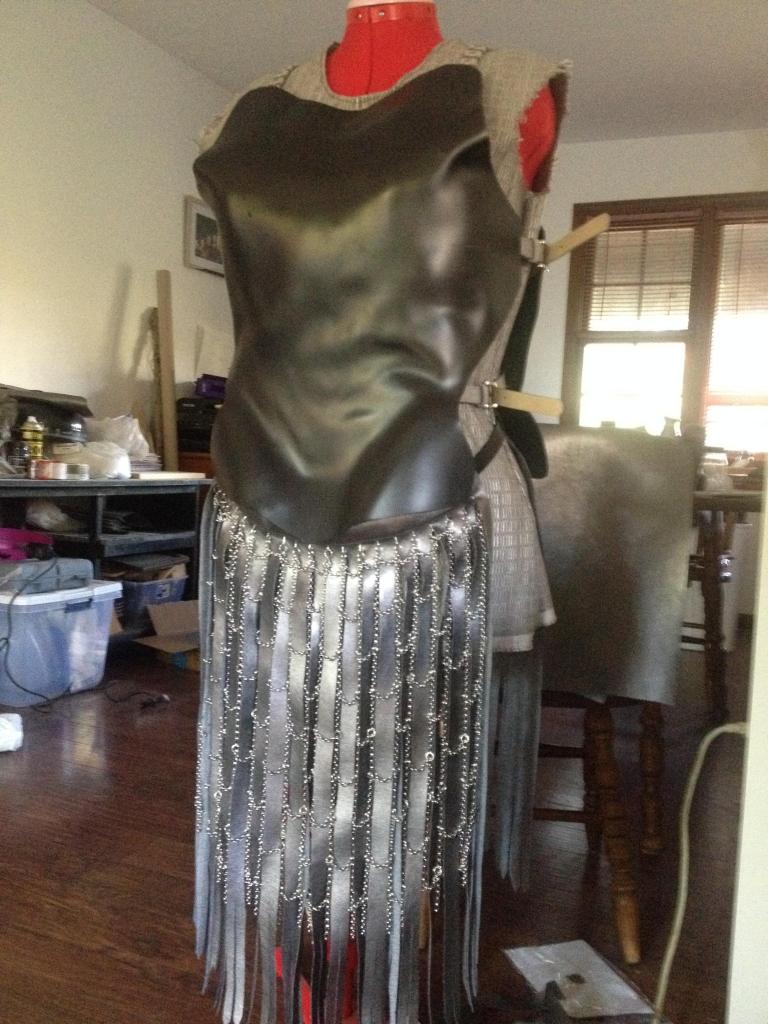
Pull together undergarments and some fine details.....
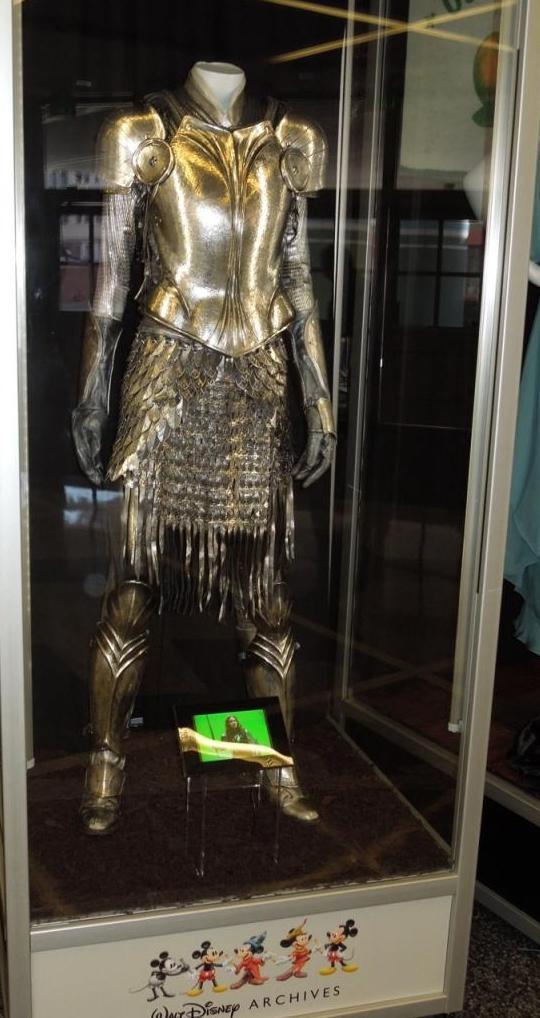
My costume Movie Costume from Disney Archives
Honestly, it needs a little more work as the chest piece is too big and bulky, but it's a nice start and good enough to win another 1st place atone small costume contest.
Ok eventually I'll get the Cheshire Cat costume done!